My friend Chris says the best tool for working on pinball is “more light”, and he’s right. Chris uses a classic clamp light. These need wall power and take a lot of space in the toolbox, too much for when I’m not in my garage.
As LEDs have gotten cheaper and more portable, I looked for a way to have a lot of light in a small space. Then I hit on this post on Adam Savage’s Tested.com. Now, I built one of these to Adam’s directions, but it didn’t work for me. I don’t have his workbench to attach to.
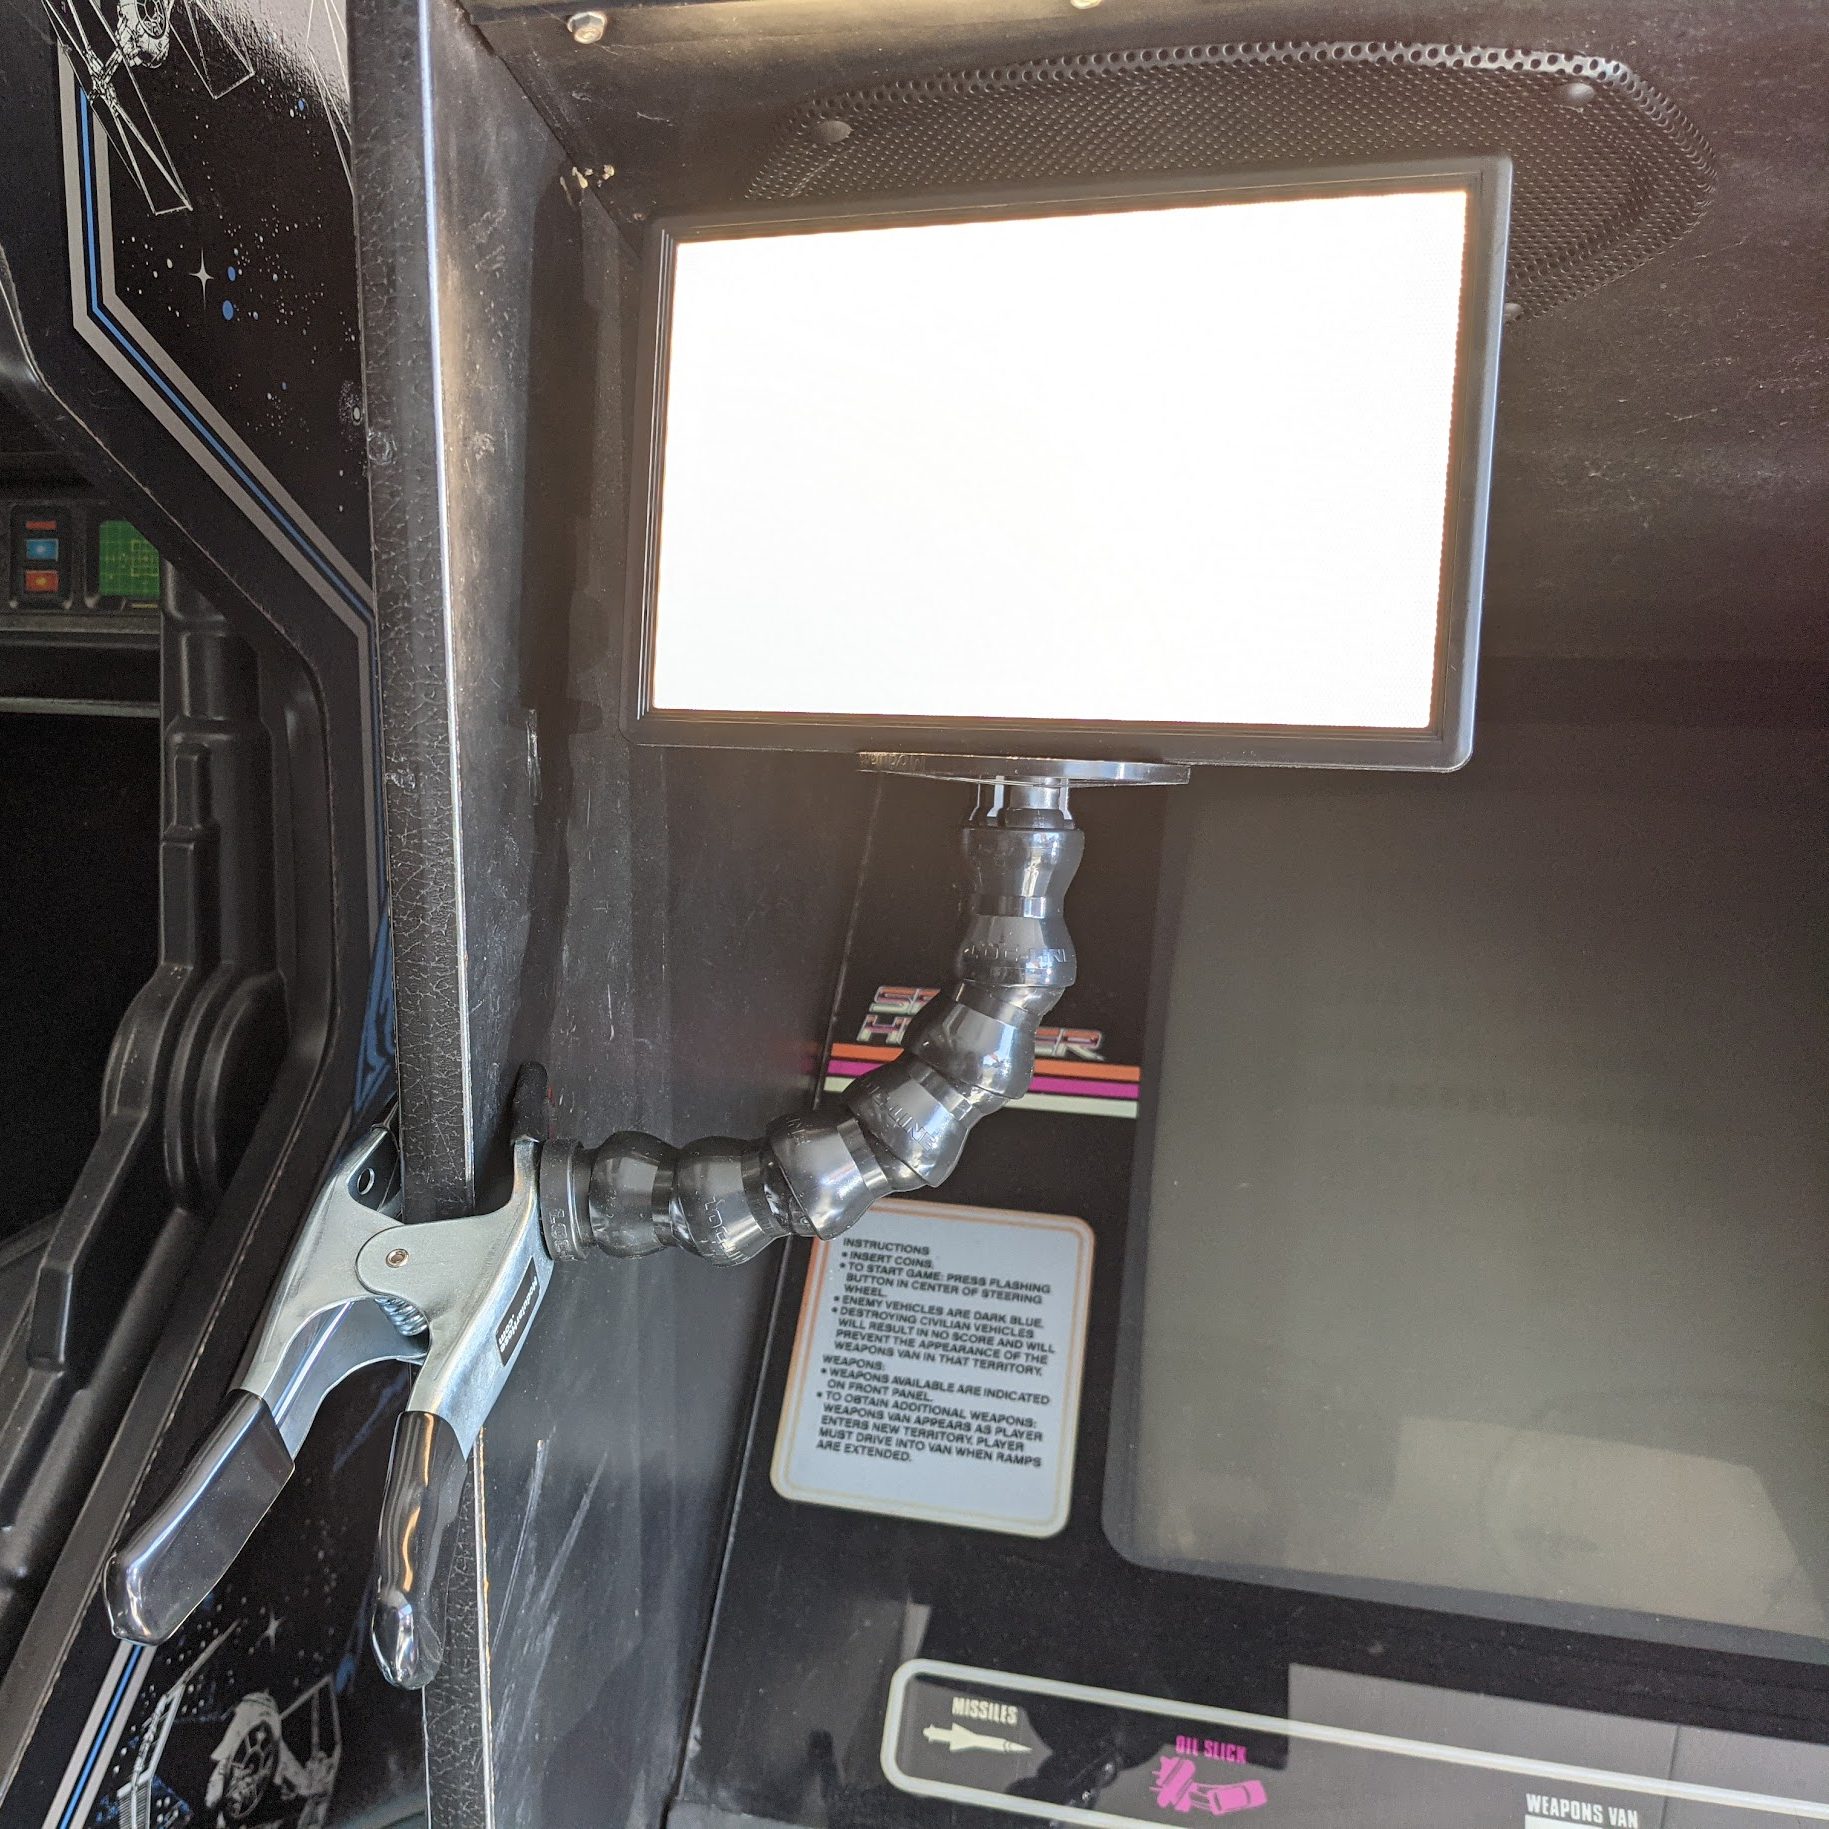
I did try attaching to a pinball machine’s siderails with Magswitch doodads, as shown in this subsequent video. Magswitches are amazing, but not in this application. Their steel bases will scratch the siderails, and depending on the game, attachment is either mediocre or nonexistent. Not all siderails are magnetic, and WPC siderails just don’t have enough iron to hold the weight.
I prefer something simpler. I got this this mounting kit and a camera-flash-type mount. (Update: Try this, a kit of just the necessary bits!)
The neck is Loc-Line, which is a modular hose. It supports a fair amount of weight on its own. I use a clamp to attach the hose to a game, a gender changer to get the right end on it, and then the camera mount to give me somewhere to attach my light.
Add a light like this. I believe this is the one Adam Savage uses, but you can experiment. As long as it has a 1/4″-20 thread, you’re all set. These are pretty cool, with adjustable brightness and color temperature.
These lights take a F550 camcorder battery (included). Newer batteries now seem to have USB-C plugs for charging, which is fantastic. I have a few of these and I move them around my work lights.
But for longer sessions, a power adapter is helpful. The lights have a barrel plug. I needed a power adapter with a 2.1mm x 5.5mm barrel plug, 12V, center-pole positive, like this. With this plug, the light can run without a battery. (Adam Savage never uses the batteries, and he runs the power cable through the hose. Since I don’t permanently attach my lamps, I don’t.)
I use 7-9 segments of hose (depending on my mood) plus the gender changer. This is just enough to get whatever angle I want on the lamp, but not enough to stress the clamp. Once you learn to disassemble and reassemble the hose, it’s easy to make a change here if you want to change length. I found I liked the lamp just as much with fewer hose segments.
Unlike the original, since I move my lights around, I found a shorter neck worked well, and I didn’t need to reinforce it with armature wire.
To save on the camera mount, I have also used 1/4-20″ hardware and the end plug with a hole in it, but the camera mount is easier to live with and thus recommended. If you decide on just the end plug, you will need a short screw, a nut, washers, and some luck.
I find the clamps here don’t mark the cabinet, and can be positioned with enough freedom to get light where I want it. If the squeeze clamp isn’t to your liking, ModularHose.com sells other clamps.
One problem: Cost. The light panel by itself is $45, the mounting hardware is another $31, and extra batteries are a thing, too. But they’re awfully nice to be able to have in my only moderately large toolbox. And if one is good, two is better.