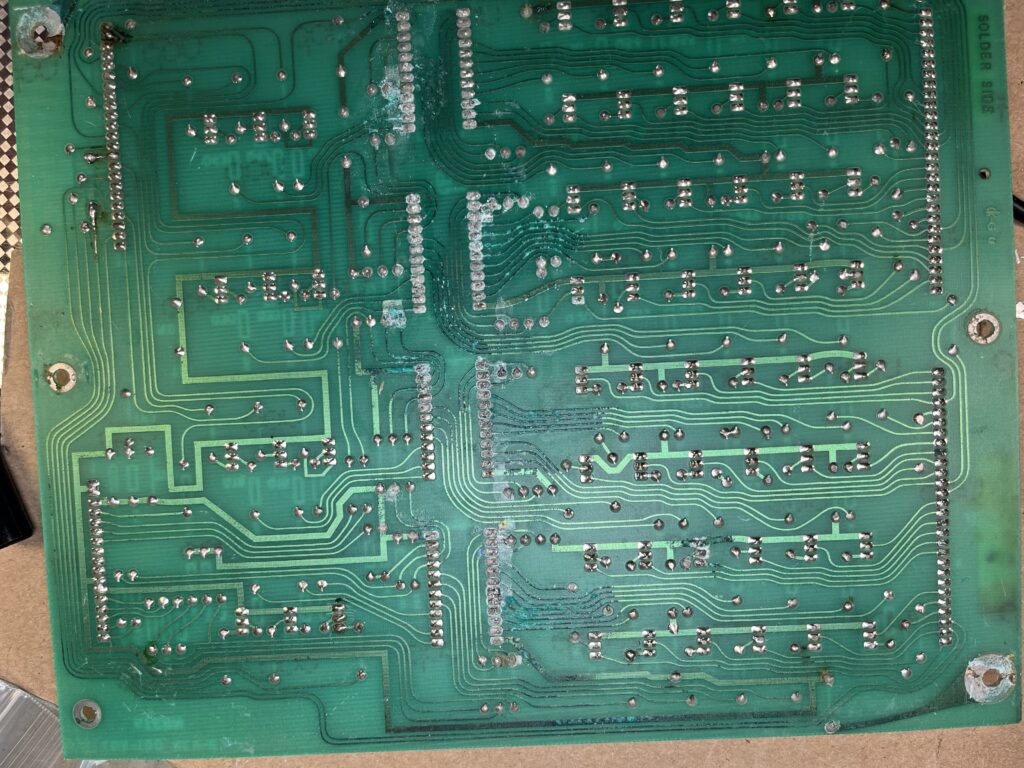
I’m working on a Stern Hot Hand. I was not sure if I was going to replace my lamp board so I could use LEDs, or keep my original lamp board and keep the game original. Then I saw the backside of my lamp driver for the first time.
I’m working on a Stern Hot Hand. I was not sure if I was going to replace my lamp board so I could use LEDs, or keep my original lamp board and keep the game original. Then I saw the backside of my lamp driver for the first time.
My new-to-me Counterforce had most of the lamps in the insert panel (behind the backglass) missing. I grabbed my supply of LEDs and populated the lot. The glare was so bad it made the game hard to play.
I replaced a bunch of the LEDs with #47 incandescents, except where I liberally used #455s, the blinky bulbs. I love these — although I see they seem to be out of stock at several suppliers. I suppose they will go NLA soon. But I have them for now, and I love their randomness and the noise that they make. Plus, since they’re usually off, the glare is greatly reduced.
When I cleaned the playfield, I upgraded several lamps to LEDs–Nifty frosted warm white, generally, since I still have a stock of those. But a lot of the playfield holes won’t accommodate the larger plastic ring on the LEDs, so I used #47s.
Initially, I didn’t know if I would LED the controlled lamps or not. But I had a couple I wanted to brighten up, and they looked so good, I started installing LEDs in all the inserts. Counterforce has quite a few non-controlled inserts — around 12 that are on when a corresponding drop target is on. All of these are yellow inserts, so I used TJ’s trick of lighting them with a pink bulb. A yellow LED bulb tends to look washed out. The pink ones look great. They look really hot in the purple inserts that Gottlieb used for extra ball.
Another 28 lamps are stepped up with an under-playfield transistor. These provide the incoming bomb lights. I haven’t done these yet, but I think they’ll look great when done.
But on my way there, I’m soldering shut a bunch of lamp sockets, or maybe replacing sockets. This is a trick I learned from Tim Arnold’s handouts a long time ago. Here’s a PDF. On old sockets, the press-fit loses its will to press-fit. But a drop of solder on the joint provides connectivity and can revive a dying lamp socket.
So far I’ve had a couple that look great with the upgrade.
I plan to do this on the bus sockets used for the bomb lamps and the bonus ladder, both of which are irreplaceable, have lots of individual wire connections, and quite a few loose sockets.
[Originally written in early 2021, minor updates in early 2024.]
I have a Counterforce that has been sitting idle since we moved to a new house. I got it set up and noticed some score digits were out. No problem, I know exactly what the problem is: I have connectors that I have not serviced. I opened the head to jiggle them.
When I went to open the head, I noticed that the key was easy to move, as if there was no lock mechanism. What actually had happened is that I did not tighten the screw sufficiently when I re-keyed the lock, and having the game on a truck for shows and a house move jiggled the screw out of the lock.
When I first got this game, I remember changing the lock. I only change head locks when I can’t find a key. On this game, I think there was no lock or the lock was defeated. I changed it to my keyed-alike lock, and forgot how the mechanism works.
In short, the mechanism on these early System 80 games moves a crossbar down and forward, which pushes two (sprung) arms forward. When the arms are in the forward position, you can’t lift the backglass.
On Counterforce, there is an extra wrinkle that the speaker mounting is in front of the lock, but a long screwdriver is very helpful in getting the screwdriver in the right place.
Note that it is useless to tighten the screw when the lock is unlocked (assuming my usual Fort locks, which will not release the key in the unlocked position). And, when the insert panel is fully open, it prevents the head from being locked (the crossbar intentionally interferes with the insert panel). However, if the insert panel is only somewhat open, I can lock the head, pull the key so the lock doesn’t turn, and then crank down on the screw.
Even by the standards of this blog, which is an absolute backwater of the Internet, this post is of very limited utility. But here it is.
To my surprise, most of my current collection is Stern games, and I think they can all be improved a little with a few mods.
I’m not a big fan of playfield mods in general, although I have done a few here and there. I find that they make the game harder to work on, they don’t affect play, and a lot of times they’re distracting. But I do have a few generic things I like.
On all SPIKE games, Stern has a good kit for headphone jacks. I like these for two reasons. First, headphones work and annoy my family a little less. Secondly, and perhaps more importantly, headphone jacks mean the volume control is on the outside of the game, and obvious. SPIKE games differentiate between headphone volume and game volume. The kit is not difficult to install, and is reversible, should you resell the game to an operator (just save the blanking plate in the cash box).
I’ve used some of the aftermarket headphone kits on Whitestar and SAM games. These are good, albeit not as good. In particular, they do not auto-mute when headphones are present, nor do they adjust the volume differently for speakers versus headphones. But they’re still good kits. My kits came from Pinnovators. (Note that these depend on both the board system as well as the coin door. Early games have a different blanking plate.)
(Unfortunately I also bought a volume control gizmo that fits into the tournament button hole. I can’t speak for it, as the headphone kit was better for me.)
I’ve written about this elsewhere on previous occasions. I miss real knockers, but since Simpsons Pinball Party, Stern has provided a path for installing a real one. Pinball Life has a knocker kit that I recently installed on my Foo Fighters. (Amusingly, they still refer to this as the “Q24” option, despite the fact that Q24 is a Whitestar relic.)
Starting from SAM games1 (WPT), Stern added a Tournament Button. On the first few games, like WPT, this was wired into the lockdown bar. Unlike current games, the lockdown bar has to be unplugged before it is removed, which is a real pain when working on a game frequently or even clearing stuck balls.
Cliffy makes a relocation kit that I installed on my WPT that I absolutely loved. (Without this kit, my tournament button spent most of its time simply unplugged.) This also meant putting a blanking plate into the lockdown bar to plug the hole. (At the time, Stern said they would sell a lockdown bar sans hole, but I never found that part before I sold my WPT.)
On later games, including my Star Trek and my Foo Fighters, there is no included button, but the wiring harness has connectors for the button, and a blanking plug is in the cabinet just below the start button. This is a little harder to install since the connectors are pretty well buried in the wiring harness, but I mean it’s a 20 minute job instead of a 5 minute job. The button is somewhat more interesting than the blanking plate.
The buttons are available from the usual suspects. (Note that I have not verified this part is the only part needed, and that the PBL price is currently less than half of the Marco price.)
Note that the tournament buttons don’t do much in home use. I just hate blanking plates for some reason.
On my Star Trek, I installed a shaker motor. My kids were pretty young when we got the game and the noise bothered them. I didn’t feel that it helped the game experience, so I haven’t bothered with another one.
The kit is easy to install and not expensive, but mine sits in my Star Trek, disabled in software. Neither my Batman 66 (since sold) nor my Foo Fighters have shaker motors, and I don’t expect to install them.
I changed the shooter spring in my WPT to the wimpiest one I could find. I sold my WPT to a friend who changed it to an even wimpier spring. But on my Simpsons, I think that it plays better with a stronger spring.
I have yet to replace my fluorescent tubes with LED tubes in my pinballs, but I keep meaning to. I did do this in some video games and I’m very happy with it.
I also generally like LEDs in GI for older games, which tend to be a little dark. Sometimes I stick with incandescent lamps in the switch matrix, and sometimes I change them to LEDs. (I use pink bulbs behind yellow inserts, which look great; otherwise, yellow bulbs behind yellow inserts tend to look washed out. Thanks, TJ!)
My friend Chris says the best tool for working on pinball is “more light”, and he’s right. Chris uses a classic clamp light. These need wall power and take a lot of space in the toolbox, too much for when I’m not in my garage.
As LEDs have gotten cheaper and more portable, I looked for a way to have a lot of light in a small space. Then I hit on this post on Adam Savage’s Tested.com. Now, I built one of these to Adam’s directions, but it didn’t work for me. I don’t have his workbench to attach to.
I did try attaching to a pinball machine’s siderails with Magswitch doodads, as shown in this subsequent video. Magswitches are amazing, but not in this application. Their steel bases will scratch the siderails, and depending on the game, attachment is either mediocre or nonexistent. Not all siderails are magnetic, and WPC siderails just don’t have enough iron to hold the weight.
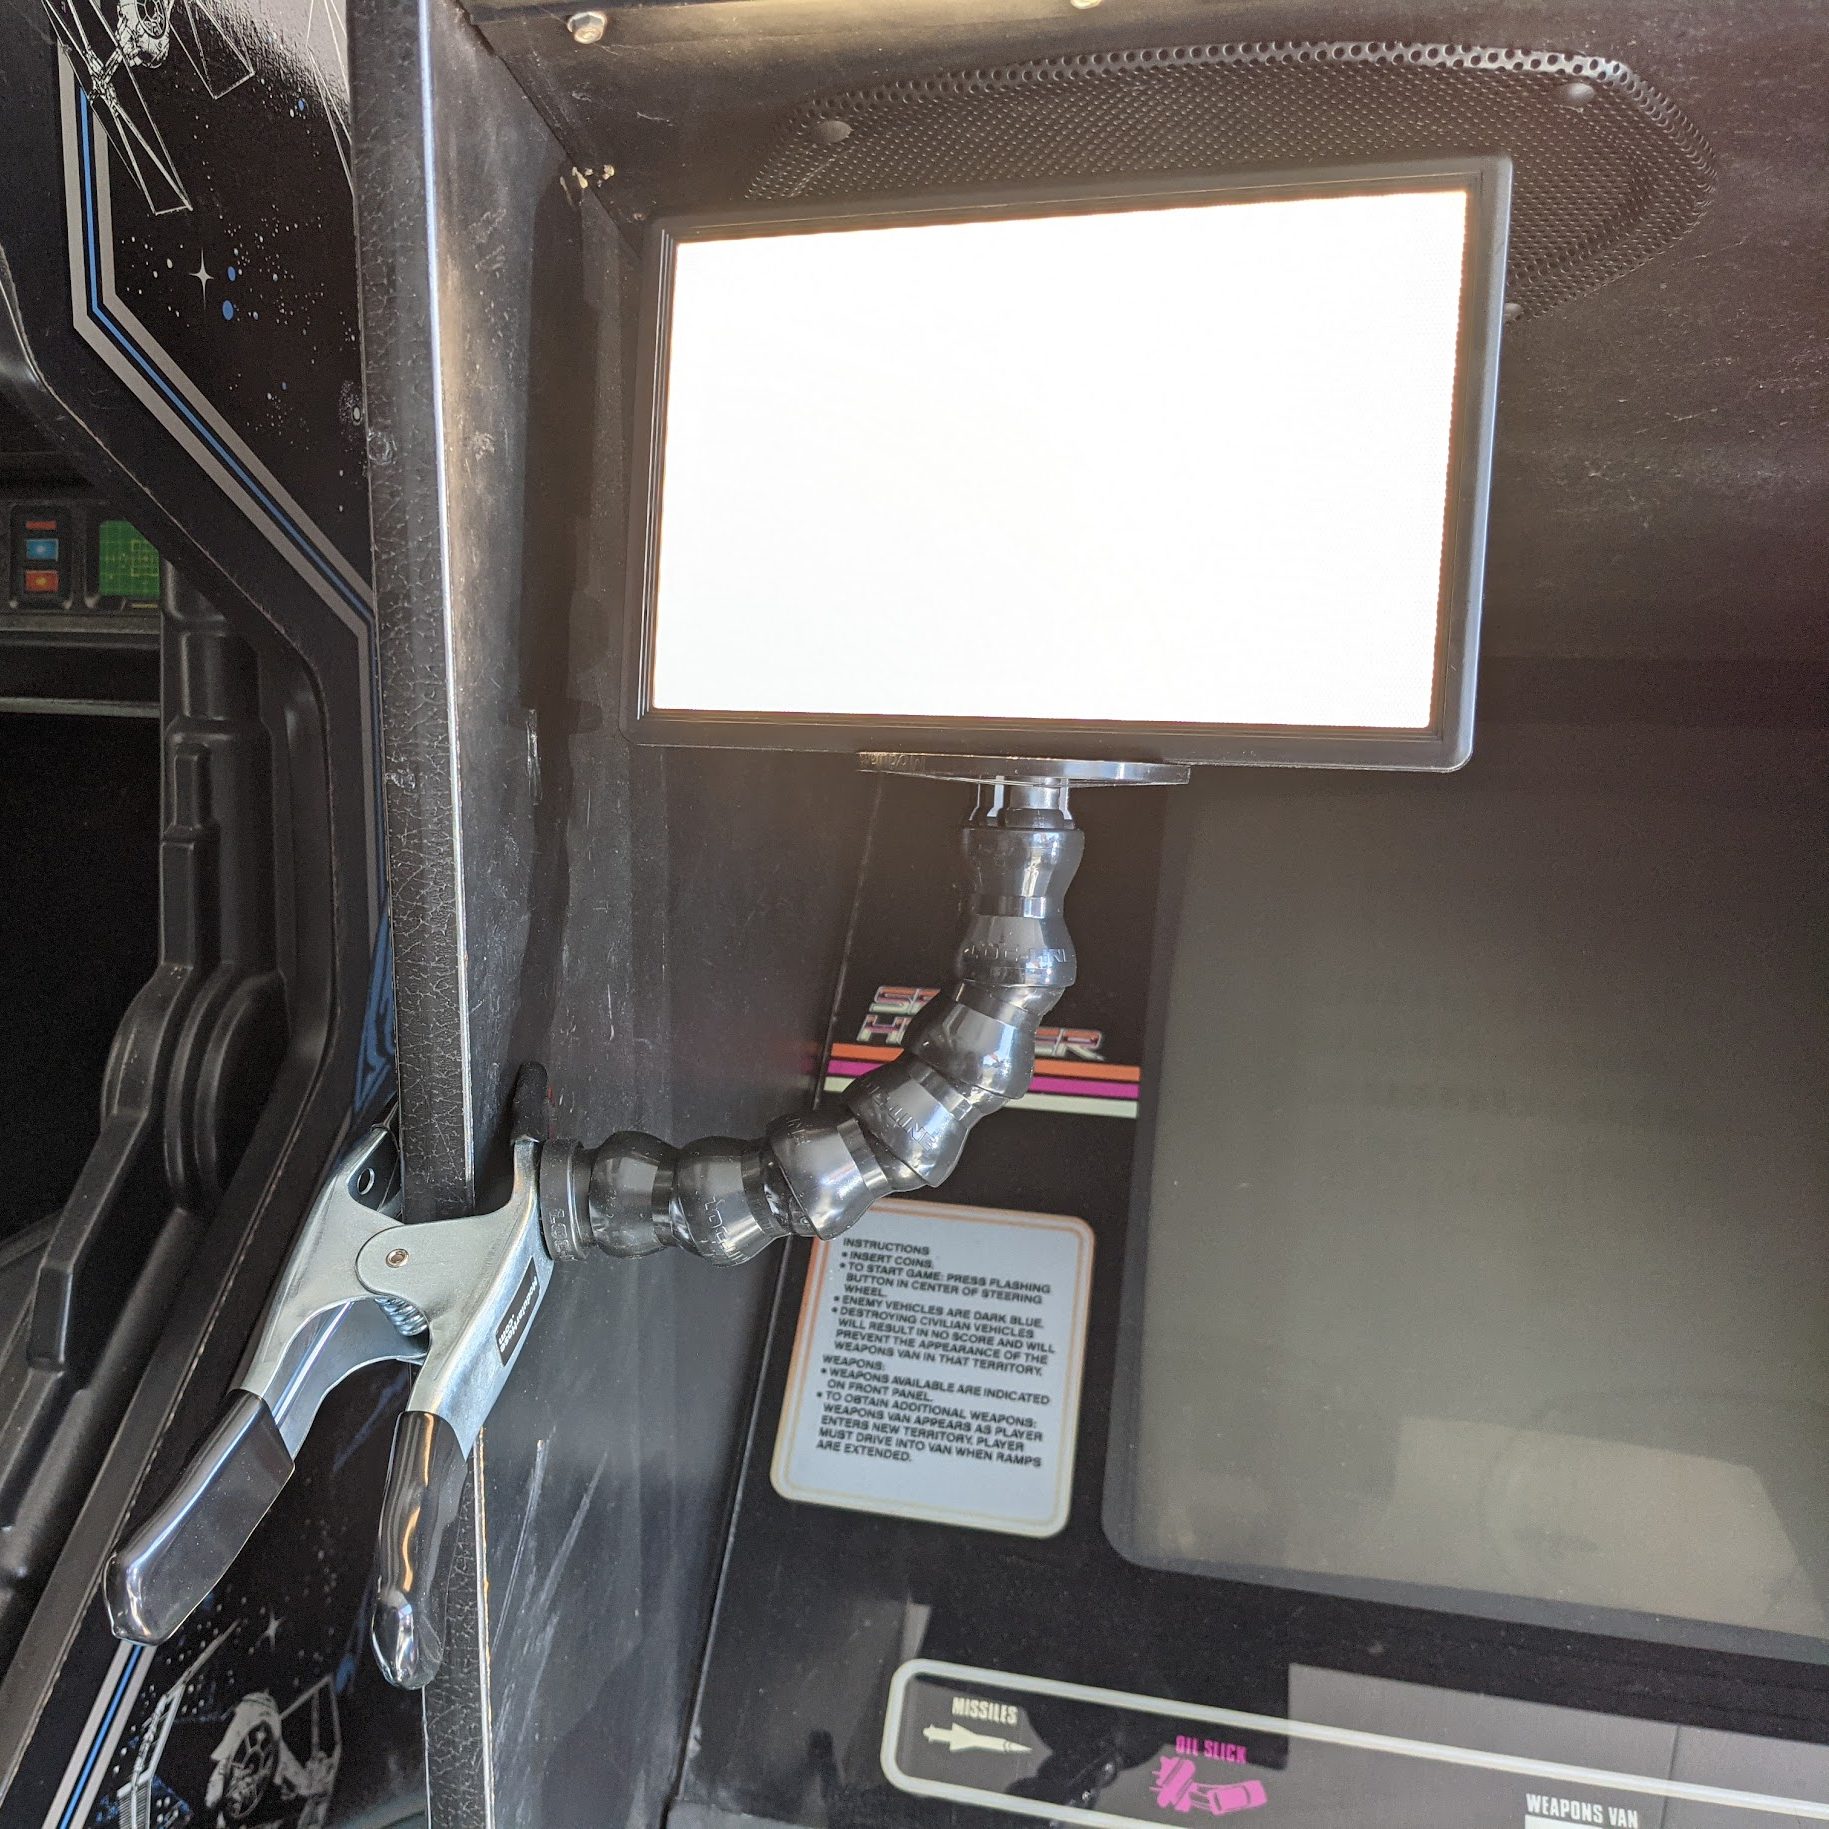
I prefer something simpler. I got this this mounting kit and a camera-flash-type mount. (Update: Try this, a kit of just the necessary bits!)
The neck is Loc-Line, which is a modular hose. It supports a fair amount of weight on its own. I use a clamp to attach the hose to a game, a gender changer to get the right end on it, and then the camera mount to give me somewhere to attach my light.
Add a light like this. I believe this is the one Adam Savage uses, but you can experiment. As long as it has a 1/4″-20 thread, you’re all set. These are pretty cool, with adjustable brightness and color temperature.
These lights take a F550 camcorder battery (included). Newer batteries now seem to have USB-C plugs for charging, which is fantastic. I have a few of these and I move them around my work lights.
But for longer sessions, a power adapter is helpful. The lights have a barrel plug. I needed a power adapter with a 2.1mm x 5.5mm barrel plug, 12V, center-pole positive, like this. With this plug, the light can run without a battery. (Adam Savage never uses the batteries, and he runs the power cable through the hose. Since I don’t permanently attach my lamps, I don’t.)
I use 7-9 segments of hose (depending on my mood) plus the gender changer. This is just enough to get whatever angle I want on the lamp, but not enough to stress the clamp. Once you learn to disassemble and reassemble the hose, it’s easy to make a change here if you want to change length. I found I liked the lamp just as much with fewer hose segments.
Unlike the original, since I move my lights around, I found a shorter neck worked well, and I didn’t need to reinforce it with armature wire.
To save on the camera mount, I have also used 1/4-20″ hardware and the end plug with a hole in it, but the camera mount is easier to live with and thus recommended. If you decide on just the end plug, you will need a short screw, a nut, washers, and some luck.
I find the clamps here don’t mark the cabinet, and can be positioned with enough freedom to get light where I want it. If the squeeze clamp isn’t to your liking, ModularHose.com sells other clamps.
One problem: Cost. The light panel by itself is $45, the mounting hardware is another $31, and extra batteries are a thing, too. But they’re awfully nice to be able to have in my only moderately large toolbox. And if one is good, two is better.
Chris refers to the Gottlieb drops as the Cadillac of drop targets. I’m not so sure, but they do play well. Drop targets are an annoying mechanism to work on, especially those with added features like trip coils.
Williams drop targets have a failure mode I call slo-mo drop targets. You smack one with the ball, and instead of clicking down, it sinks slowly into the playfield. This comes from dirt. If they’re really dirty, you can hit one, the ball can move far away, and then it sinks. It’d be cool if it happened on purpose.
I got this Gottlieb Counterforce. And it had slo-mo drops. I’ve never seen this in a Gottlieb game. There’s nowhere for the dirt to hide. So, while shopping out a bunch of stuff wrong with this game, I did the drops.
I replaced all the targets (which didn’t match). I followed PAPinball’s guide, which is very good. I didn’t expect this to fix anything, but I hoped it would. It didn’t.
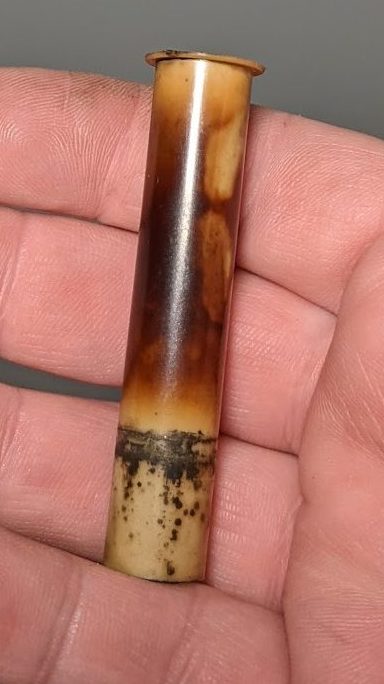
I cleaned the coil sleeves for the two reset coils, which didn’t really help. So I removed the bank and did a deeper (but still half-assed) cleaning. When I was done, I still had slo-mo targets. (This sleeve is cooked, but it still works OK. Perhaps I’ll replace the coil, but for now, it’s working fine.)
It became pretty clear the problem was with the reset bar not sinking. If one target was already fully down, any other target would drop quickly. But if no targets were all the way down, you’d get slow action because the drop target had to push the reset bar down. So once the reset bar was down, targets would drop quickly.
On this mechanism, there is some freedom to adjust the coil in the bracket. Coils can be twisted slightly relative to their plunger and the reset arm. The coil needs to be square to the bracket, and both coils need to be at about the same depth. The coils can be adjusted slightly so the reset bar doesn’t over-extend the targets out of the top of the playfield, but they need to be square to the mechanism to work correctly.
Now, as drop target banks go, this one has all the bells and whistles. There are seven drops, but there are seven trip coils on the top, too. These are triggered by the computer when it wants to drop a target. In Counterforce, these are triggered by rollover switches and standup targets scattered all over the playfield. Each drop target has a sense switch, but it also has a lamp voltage switch used for “when lit” indicators for the trip switches, and also for the big falling-bomb gimmick.
On my game, one of the trip switches didn’t trip. This appears to have been a coil that was open. The coil was A-18642, but research indicates there are a couple other usable substitutes, one of which was in Chris’ parts bin. So that’s what got used. (Pinball Resource can identify the substitutes, if necessary, but they also have the correct part number.)
I was able to identify that this coil was open by using a multimeter. In the diode setting, I was able to measure the diode of the bad coil — but not of the good coils. For the good coils, when I try to measure the diode, I measure the coil instead. So that was my indication that the coil was at fault.
So far, so good. Resoldering these coils is kind of a pain because there’s so little clearance in this mechanism.
My Counterforce is still torn apart waiting for other parts, but the drops all now work correctly.
So:
This all applies mostly for Gottlieb drop targets. In any case, I haven’t generally had problems with them once they were rebuilt in home use.
On Williams games with the horseshoe mechanisms, the problem is the horseshoe mechanism. Those things are terrible.
On Williams games with optos, and I suspect those with leaf switches at the bottom of the column, they get dirty and sluggish. I cleaned my BK2K’s targets once and they’ve been great, even after the game was operated for six months at the PPM.
On old Stern games, there’s only one spring that drops the target, so it can be twisted by the spring. If you can get that adjusted correctly, they work great, and can be swept by a good shot. I love these.
Old Bally games are similar, but I don’t have as much experience with them.
I have seen two different drop mechanisms on new Stern games. On my WPT, there’s a service bulletin to enlarge the catch shelf for targets that has cured most of my woes. On my Simpsons Pinball Party, I had a loose connection — otherwise it’s been quite reliable.
It’s sad to see a $12,000 pinball collection with only one game. Is Attack From Mars awesome? Yes. Is it worth $8,000? Perhaps. Is it worth an Eight Ball Deluxe, a Taxi, and a High Roller Casino? No.
If you want to pay big money for a brand new Stern, great! But don’t be afraid to buy a rougher, older game. They are also fun, reliable, and surprisingly affordable!
I started this draft so long ago, this originally said $6,000 for an Attack From Mars. I had to make the numbers bigger because the numbers keep going up. And now I’ve bought NIB games myself.
My point stands. As pretty as Stern LE games are, Premiums are a better deal. For a lot of titles, Pros are a better deal still, since they play better for some titles.
I got a Bally Star Trek back in November 2014. I knew the computer would be corroded, so I pulled it and removed the battery. I didn’t leave myself enough lead and I don’t think I’ll ever get both terminals out. There are quite a few missing traces and damage. I hurt my hands trying to get the damage out.
I picked up another board from a sale on RGP, also from a Star Trek, that is a better candidate. It only had a little corrosion, but it doesn’t boot.
As a stopgap I picked up an Alltek CPU. I want a -35 CPU for some reason, so I’ll probably still fix the clean one when I have a chance to get some help.
When checking out the head, I found my driver board (one of the nice Stern ones with really elaborate silkscreening) was missing two transistors. I replaced them. While I had the board out, I removed the filter caps for the high voltage and the +5V. The +5V cap was bulging—so its days were numbered anyway, as if being 34 years old wasn’t enough reason to replace it.
Power cord was missing ground prong and was a little damaged, so I replaced it.
My lack of skill at drilling out the lock left lots of metal shavings in the game, and since the lock is over the rectifier/transformer assembly, I pulled it and vacuumed out the head.
The sound board was removed to make it easier to get the transformer out, so I re-capped it. I re-installed it and the game had a loud hum tied to the number of lights on. I removed the sound board a second time, and discovered about a third of the header pins had obvious cracked solder joints. I resoldered them and plugged the board in and it worked great. Then I screwed it down and the hum was back. I’m guessing I have a floating ground somewhere. Given the obvious age of the header pins, that is not surprising.
I was missing a full row and a full column of switches, including the outhole and the saucer. (When I bought the game, the seller told me that it didn’t work. He didn’t know about any of the other problems.) I re-pinned the connector to the MPU and I have most of the switches. I suspect cleaning will make the rest work.
So, it plays. Just not well.
After I wrote this, the draft sat around for years. So did the game. That’s the problem with old games: they are great for storage. Around 2017 I borrowed the SDU board. It sat outside the cabinet for three years until I got around to re-installing it.
In 2020 at the beginning of the pandemic, I got an offer for the game as-is. Since I had too many projects, I sold it, and a CPR playfield. And I finally have some space for the Eight Ball Deluxe project.
A few years (!) ago I bought a Spy Hunter. It played blind.
I got this game as a sweetheart deal, and I got a great price because it wasn’t working. It belonged to a friend who used it for party rentals. I knew it had been well maintained. Must be a loose wire or a fuse or something.
I talked to Chris, who said that if I pulled the boards apart, everything would work until the game got moved. Well that sounded pretty annoying. So, as I am wont to do, I bought some parts—in this case, a set of new interconnect cables—and put them in the cash box for some other day.
Well, that day was in late 2019, when I conned GMike and I into taking a look at it. Still no video, and no obvious reason for no video. So we replaced the interconnect cables. This is a pretty large pain in the ass, because the MCR III system is such a convolution. Power comes in one end of the board stack, I/O comes in the other end, and all the spring tension on the connectors is so tight, they’re nearly impossible to take apart.
GMike and I got the boards apart on the dining room table, cables replaced, back together—same thing. I texted the previous owner and got the scope out and handed it to Mike, who confirmed the video pins weren’t videoing. I have a pattern generator for the monitor, which proved it was OK. The text conversation went back and forth a few times until I realized the video signals weren’t connected to the CPU, but to the Super Sound I/O board which, for some reason, has a connector with exactly the same connector as the CPU.
So we moved the connector over and played some Spy Hunter.
Next problem: bad power switch. I think it had just mechanically failed and wouldn’t stay off. Unfortunately we had to change the QD connectors from .25 to .187, but they work just as well.
Last problem: no saved settings. There are two types of difficulty setting in Spy Hunter. One is DIP switches and controls how long the “unlimited cars” time is. The other is in software, and coincidentally, also saves high scores and bookkeeping.
The battery had long since been replaced with a supercapacitor. But when the power was shut off, whether or not the card rack was connected to the power supply, the available voltage dropped to nothing quickly. So, GMike put a new cap in it. That would at least hold voltage with the power off. But with the boards connected, voltage would drop.
Chris suggested replacing the 6116 on the CPU, or the capacitor and diode on the power supply related to the battery. I had the cap and diode, so I replaced them. I would have done the 6116, but it’s so difficult to get the card rack out, I put it off. I got some 6116s from Chris on a visit to his shop, and actually ordered an NVRAM so that I’d only have to go at this once.
Tonight, though, rather than put the NVRAM in, I wanted to get the 6116 to work. It’s so difficult to get the ribbon cables off, I stopped trying, and learned to work with the boards connected (very carefully). Actually, the Spy Hunter is in the garage, and the available low-static workspace I had was a pinball machine in the house, so I just took it inside. Where it’s warm.
I got the stack apart and couldn’t find the 6116 on the CPU board. So I looked around and saw that it’s actually on the video board. I put in a new chip, and no change. (OK, one change: the video connector is so hard to get on, I missed pins and corrupted the video. Other than my heart breaking that I just broke the game, no problem.)
So I put the NVRAM in. It barely fit in the stack. Plugged it back in, and the sprites were either missing entirely or corrupt. Uhoh. Had I changed the wrong 6116? Yep. The correct 6116 to change is on the CPU board, at 5G, and this was documented by the vendor. I had missed it because the original chip had a weird part number. So, on my third reassembly of the day, I put the right chip in and reinstalled, and things appear to be working!
(So I can’t really say that the NVRAM didn’t fit. I mean, if you put it in the wrong place, it doesn’t fit. That isn’t helpful. However, the NVRAM will not work as video RAM. That’s also not helpful but is something of a fun fact. I guess.)
I finally increased the difficulty from default 3 up to maximum 9. It’s a more interesting game. At 3, there are a lot of times where there are no spy cars to attack. At 9, there are spies almost all the time. It’s great.
I re-checked the voltage, and with the power off, it stayed around 4.80, a big change from the various broken parts. So far, the cap appears to be working.
I have more or less finished a shop job on my Simpsons Pinball Party over six years in the waiting. One problem that I have been frustrated with was the drop target bank got confused sometimes and would award “drops completed” several times. Careful observation over an extended period of procrastination and play revealed that the middle target seemed to be at fault.
I actually went as far as buying some new microswitches, just in case one was flaky. Then I remembered to always look for a bad connection first.
The diodes on these switches are mounted on a terminal strip a few inches from the drops. I thought for sure one would be cracked, but they looked fine.
So I pulled the drop target bank out of the game, and one of the QD connectors fell off of its switch lug. I used pliers to squish the switch a little bit together and slid it back on. So far so good!